| home | builders | Search |
| builders ➜ Power Supply and Backup ➜ Robust power for Raspberry PI ➜ Purchasing and Wiring Meanwell RS-15-15 |
| home | builders | Search |
| builders ➜ Power Supply and Backup ➜ Robust power for Raspberry PI ➜ Purchasing and Wiring Meanwell RS-15-15 |
|
See also: Control Panel/Raspberry PI Shelf
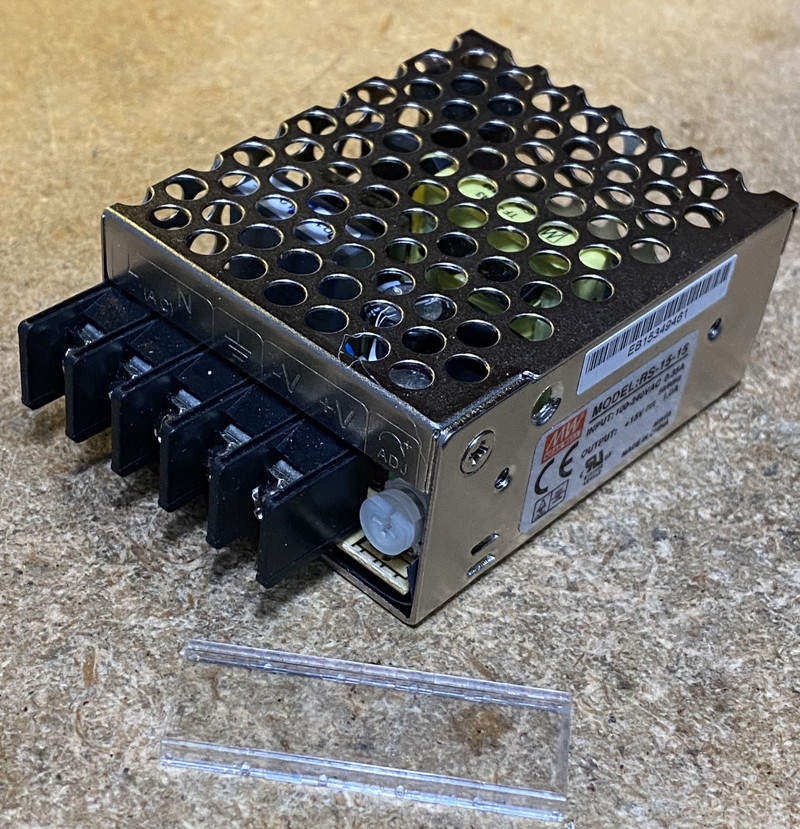
See also: 5.2 V Regulator See also: Robust Power For Raspberry PI See also: Assembling the Switchover Circuit Purchasing and Wiring Meanwell RS-15-15We use the Meanwell RS-15-15 to power the Raspberry PI and digital section of the node, and also to trickle charge the small Gel-Cel used for backing up the Raspberry PI. This page is about hooking up AC and DC power to the Meanwell and tuning it's output to the appropriate 14.2V for our backup circuit. Specifications for the Meanwell RS-15-15 are available atSpecifications at meanwell.com Purchase the Meanwell Meanwell RS-15-15 from Mouser Meanwell RS-15-15 from Digikey |
|
| WARNING!!!!
This process needs to be handled very carefully as 110VAC is dangerous. I am not qualified to describe this at all and I'm completely unfamiliar with the wiring requirements outside the USA. Please consult local information to determine if you can safely and legally use this kind of power supply. Proceed at your own risk. If you are uncomfortable doing this part of the project, please contact somebody you would find to be qualified. Please be prepared to survive screwing up, and then do not screw up. Check and doublecheck. |
 Wiring:
The color codes of the wires are not obvious though they are supposed to be obvious.
While the Wiring-Code that describes safe electrical connections is quite clear about the colors expected in AC power cables in various countries, the color codes are not the same in the different countries.
In the USA, where there is supposed to be one standard, I have found power cables that have correct colors for the European market, and they are not the same as USA colors.
Either way, I don't trust that the colors are wired to the pins they should be wired to.
Wiring Color Codes [allaboutcircuits.com]
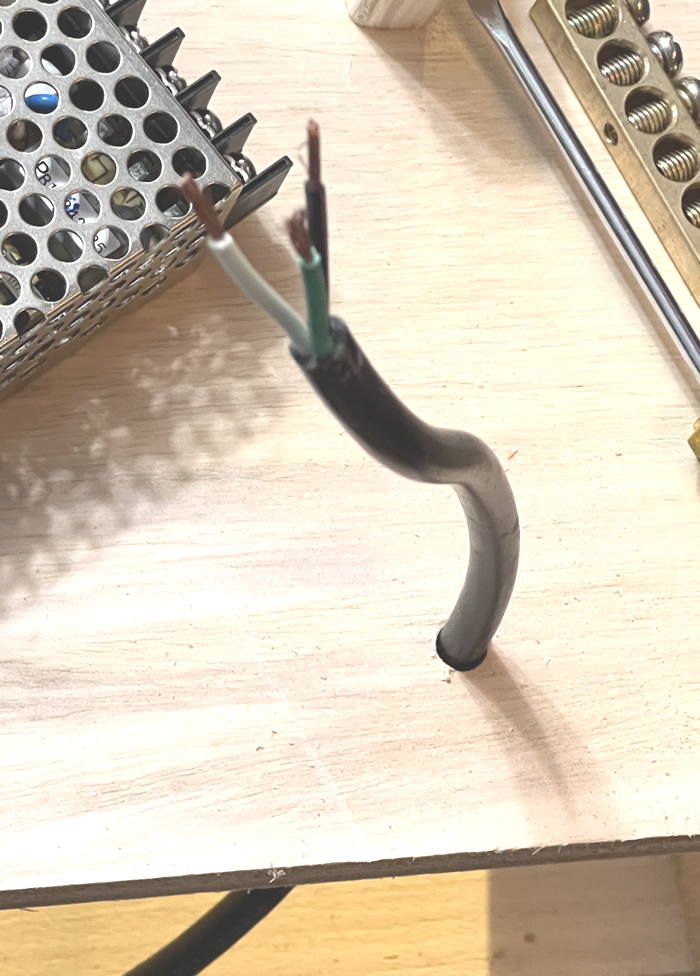
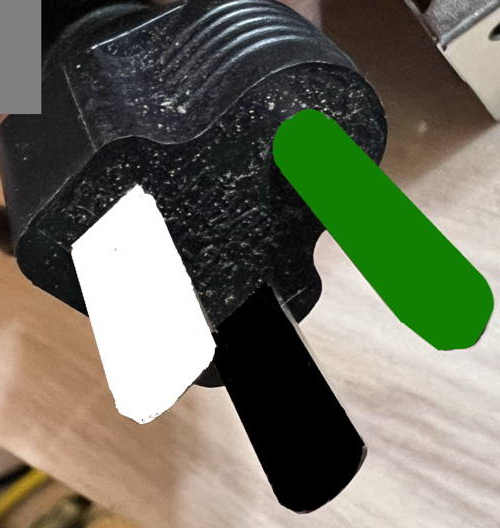
Before wiring to the Meanwell supply, use an ohm-meter to verify that the color wires are correctly wired to the plug.
Refer to the 3-prong plug diagram for white, black and green colors.
Wiring:
The color codes of the wires are not obvious though they are supposed to be obvious.
While the Wiring-Code that describes safe electrical connections is quite clear about the colors expected in AC power cables in various countries, the color codes are not the same in the different countries.
In the USA, where there is supposed to be one standard, I have found power cables that have correct colors for the European market, and they are not the same as USA colors.
Either way, I don't trust that the colors are wired to the pins they should be wired to.
Wiring Color Codes [allaboutcircuits.com]
Before wiring to the Meanwell supply, use an ohm-meter to verify that the color wires are correctly wired to the plug.
Refer to the 3-prong plug diagram for white, black and green colors.
 If your cable is appropriate for this task with the proper white, black and green and they are connected to the plug in the USA standard order,
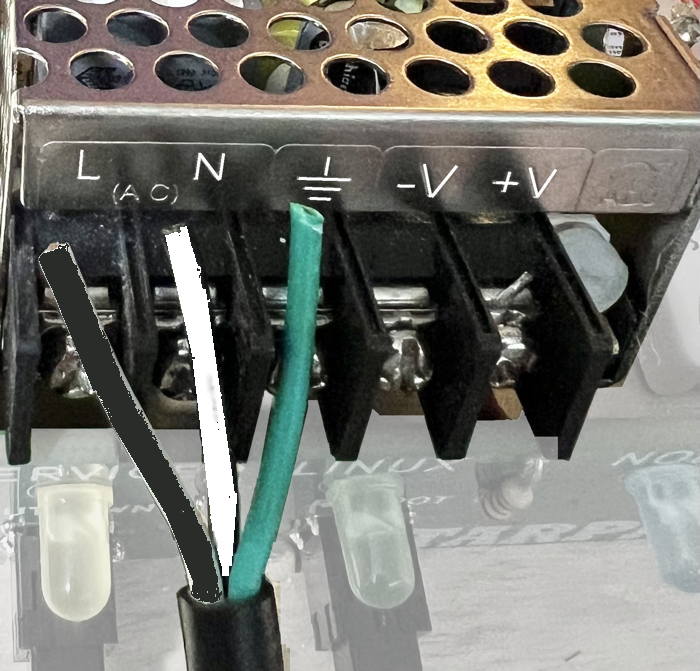
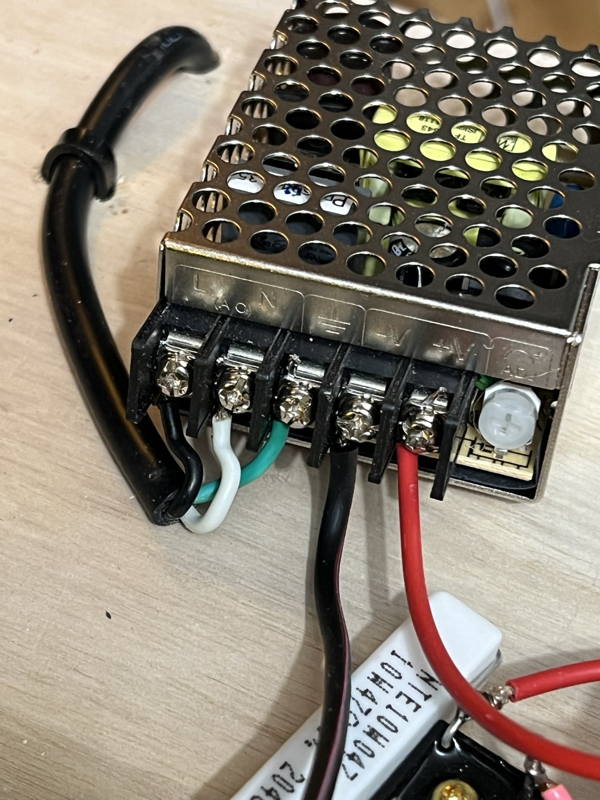 Connect a red wire to the V+ terminal and a black wire to the V- terminal.
Test AC ground to not get killed
Connect a red wire to the V+ terminal and a black wire to the V- terminal.
Test AC ground to not get killed