| C | Obsolete | | |
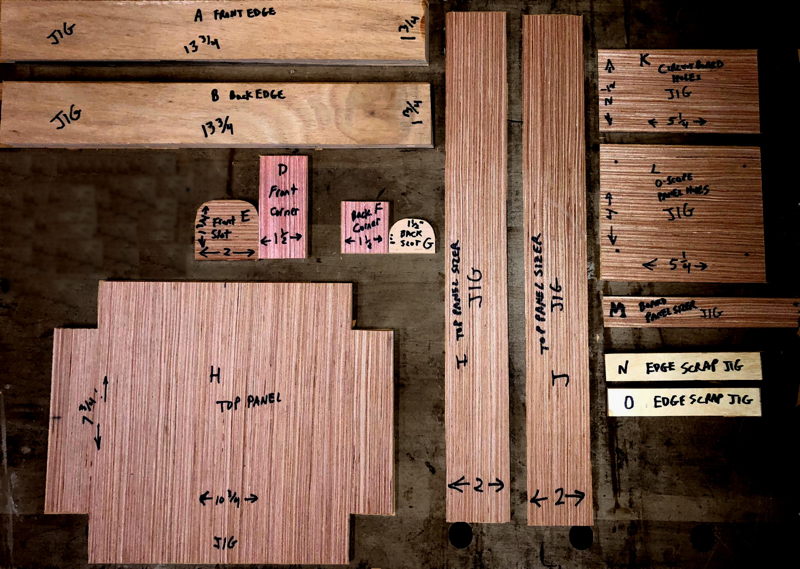
| D | Front-Corner-Jig | 1-1/2″ x 3″ |
Used in Wood Cutting to set the location of the front slot. |
| E | Front-Slot-Jig | 2″ x 1-3/4″ |
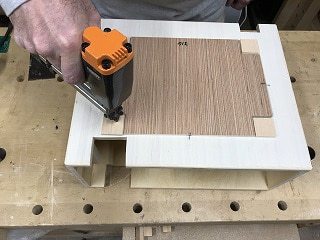
Used in Assembly and Wood Cutting.
In Assembly the 2″ width of this jig is used to position the Scope-Panel.
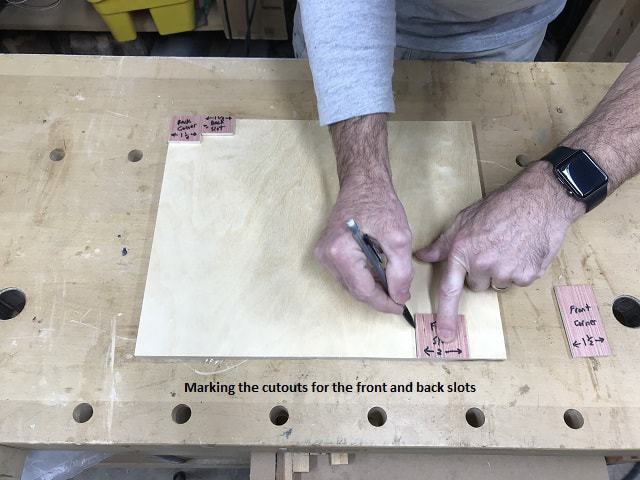
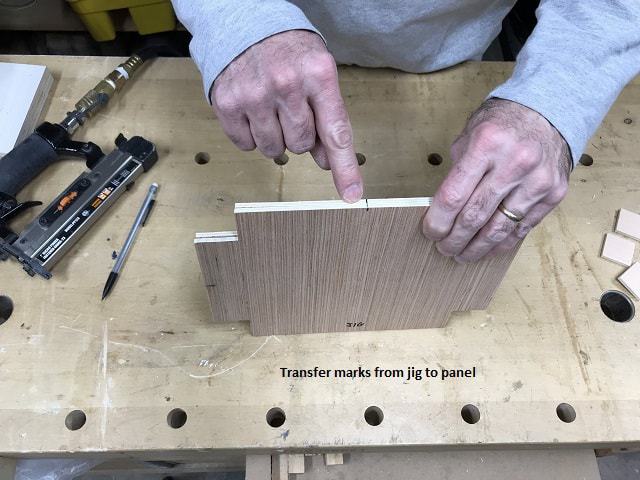
During Wood Cutting, the builder will draw the shape of the front slot using this jig |
| F | Back-Corner-Jig | 1-1/2″ x 2″ |
Used in Wood Cutting to set the location of the back slot. |
| G | Back-Slot-Jig | 1-1/2″ x 1″ |
Used in Wood Cutting. The builder will draw the shape of the back slot using this jig |
| H | Top-Panel-Jig | 10-3/4″ x 7-3/4″ with a 1-5/16″ square removed from each corner. |
Used in Assembly and Wood Cutting.
During Assembly, this is used to position the inner footpads on the bottom of the box and also to transcribe the center-lines during positioning of the Top-Panel |
| I | Top-Panel-sizer-Jig | 2″ x 13″ | |
| J | Top-Panel-sizer-Jig | 2″ x 13″ | |
| K | Circuit-board-holes-Jig | 5-1/4″ x 2-1/2″ | |
| L | O-scope-panel-holes-Jig | 5-1/4″ x 4″ | |
| N | Edge-scrap-Jig | 5″ x 3/4″ | |
| O | Edge-scrap-Jig | 5″ x 3/4″ | |
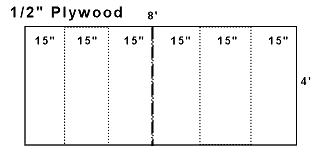
Each 15″ x 48″ piece gets cut again. --
| 1 | |
Starting with a 4′ x 8′ of 1/2″
Birch plywood, cut the long dimension into 15″ sections.
The cut has to leave at least 14-3/4′ as that dimension will be shaved later.
Each of the 6 pieces will be 48″ x 15″ and each of these should make one box. |
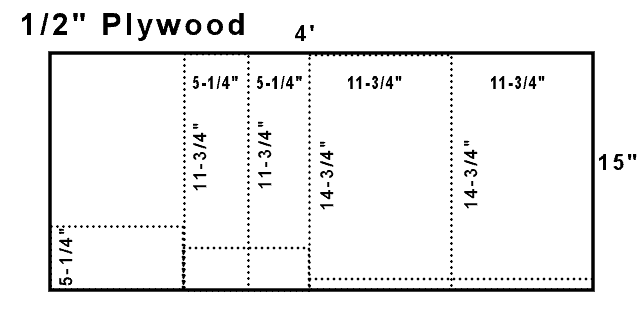
| 2 | | From one of these pieces, make the following cuts: |
| | a | Long-ways, make a cut at 11-3/4″ to make a piece 11-3/4″ x ~15″ will be Box-Roof |
| | b | Long-ways, make a cut at 11-3/4″ to make another piece 11-3/4″ x ~15″ will be Box-Bottom |
| | c | Long-ways, make a cut at 5-1/4″ to make a piece 5-1/4″ x ~15″ will be Box-Left-Side |
| | d | Long-ways, make a cut at 5-1/4″ to make another piece 5-1/4″ x ~15″ will be Box-Right-Side |
| | e | Turn the remaining piece 90 degrees and make a 5-1/4″ cut to make a piece 5-1/4″ x 13-1/2″ will be Center-Support |
| 3 | | Make the following cuts to create the designated parts common to both types of boxes: |
| | a | Cut the &15″ length from step a above to 14-3/4″ to make the Box-Roof |
| | b | Cut the 15″ length from step b above to 14-3/4″ to make the Box-Bottom |
| | c | Cut the 15″ length from step c above to 11-3/4″ to make a Box-Left-Side |
| | d | Cut the 15″ length from step d above to 11-3/4″ to make a Box-Right-Side |
| | e | Cut the 13-1/2″ length from step e above to 6-3/4″ to make the Center-Support of 6-3/4″ x 5-1/4″.
Also cut a 3/4″ piece from what is left over to create the Front-Right-Panel-Brace of 5-1/4″ x 3/4″
|
| 4 | | Cut the remaining parts to make the following: |
| | a | 9″ x 8-1/2″ O-Scope-Pan |
| | b | 5-1/4″ x 4″ Scope-Panel Not Anymore???? |
| | c | 5-1/4″ x 3/4″ O-Scope-Panel-Brace |
| 5 | | If working on a radio box, cut the remaining parts to make the following: |
| | a | Two 5-1/4″ x 3″ parts to make the radio-block
|
| 6 | | From what is left over, cut the two 4-3/4″ x 3″ floor and ceiling supports |
| 7 | | From a 1/4″ sheet of plywood, cut the following parts: |
| | a | 10-3/4″ x 7-3/4″ top panel |
| | b | 5-1/4″ x 2-1/2″ circuit board panel |
| | c | Four 1-1/4″ x 1-1/4″ footpads |