page modified March 24, 2016
TNC-PI Kit Ordering and Assembly
This page details the assembly of the TARPN version of the TNC-PI kit Rev 2.3. Other TNC-PI versions, see
this page.
The TNC Printed Circuit Board should be labelled Rev 2.3.
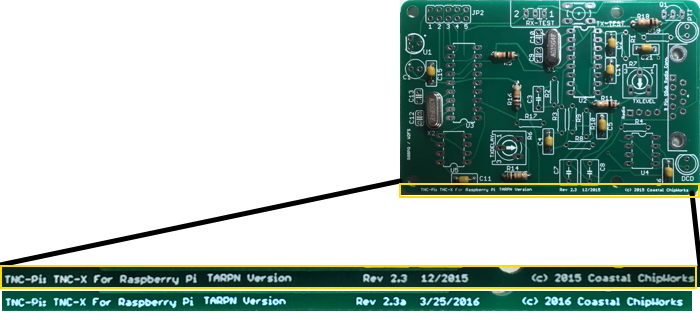
If your board has a different silkscreen, see
this page.
The TNC-PI is designed, packaged, and sold as a kit by Coastal Chipworks.
See below for a link to purchase the TARPN-tailored version of the TNC from Coastal.
The TARPN-tailored kit is shipped with the 10-pin header and with a CPU preconfigured for I2C operation as per TARPN setup instructions.
See the
Coastal Chipworks webpage for generic TNC-PI.
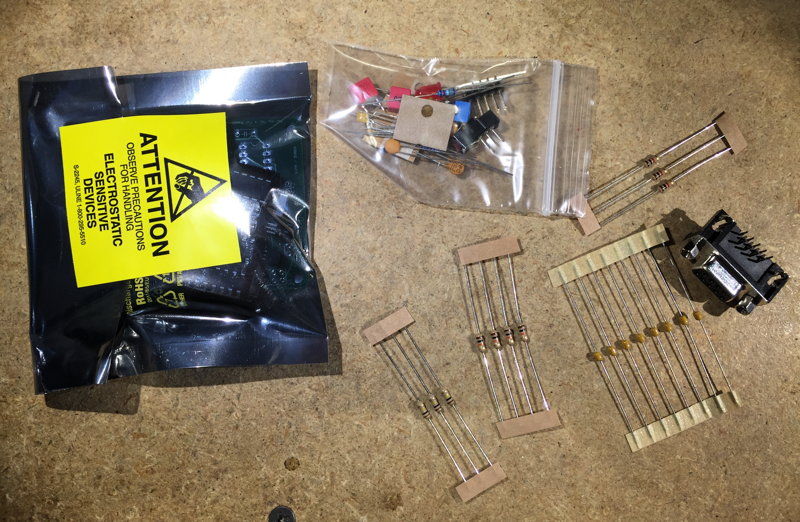
Caveat: My instructions are written for an experienced kit-builder though this kit isn't particularly difficult compared to any other beginner kit.
The issue is that I don't know all the things to advise you on up front and a beginner kit would have that kind of advice.
That said, I suggest you use a temperature controlled soldering iron, and rosin core lead solder, 60/40 or some such.
Also, don't use flux on the board.
Cleaning the board before or after soldering should not be necessary.
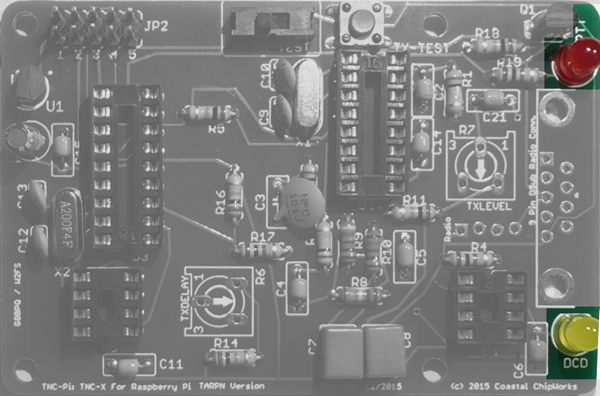
The part designations, like R1, U2, etc... are silkscreened on the top of the board.
Insert all parts from the top of the board where the appropriate designator indicates.
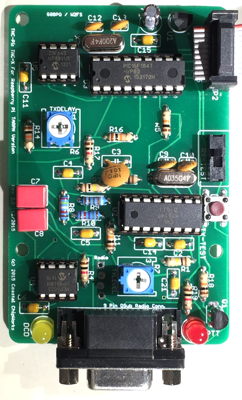
The photos provided may be helpful.
If there is a step which installs multiple parts, you can put all of the parts into the board in any order, and then solder all of them at once.
The reason for the step–wise assembly order is so in each step when the board is flipped upside–down for soldering the board doesn't
rock too much, and for some steps you can take advantage of the table–top to force the parts flush to the board for best mechanical stability.
The test step, to assure proper voltage regulator function, is done as early as convenient.
What you will need
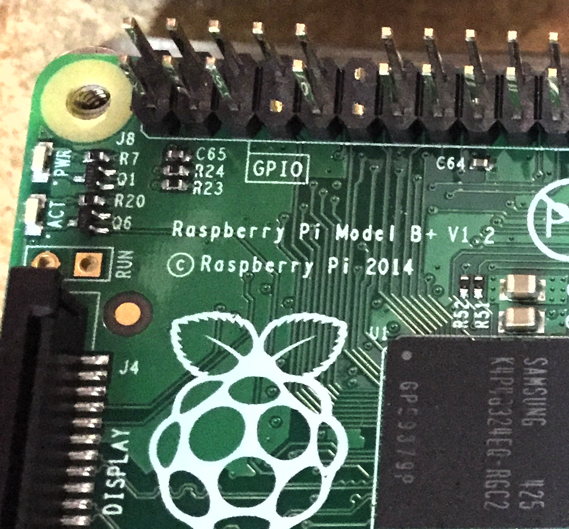
- Appropriate Raspberry PI modified with 3 cuts on the header as shown here:
- Power supply for the Raspberry PI to plug into the micro-USB socket.
- Insulation Displacement Connector ribbon cable with 2 or more connectors to power up the TNC-PI.
- Volt Ohm Meter to check the TNC-PI regulator
- diagonal cutters
|
|
Some of the images on this page can be enlarged and opened in a new browser tab by clicking on them.
Install parts in this order:
| 1 |
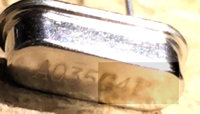
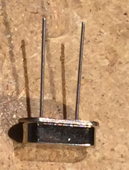
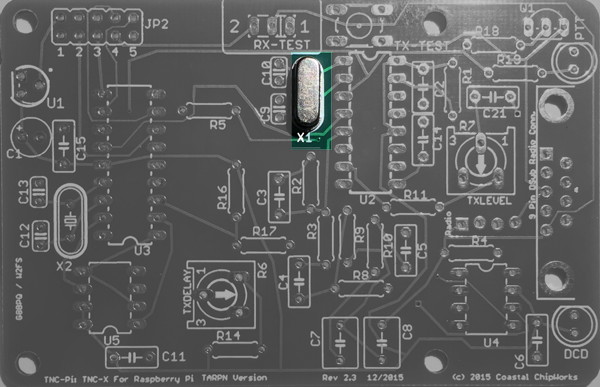
X1 |
3.57 MHz crystal
 |
 |
| 2 |
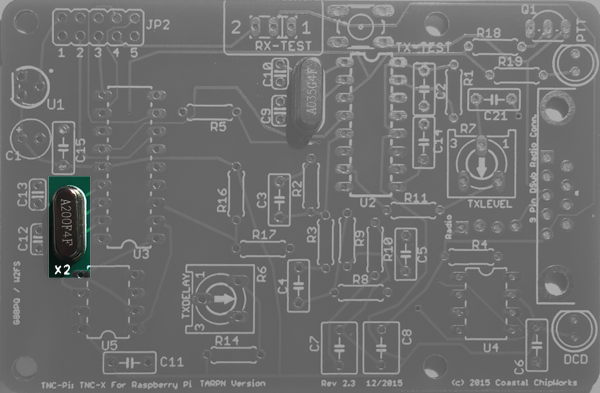
X2
| 20.00 MHz crystal

 |
Note: Make sure you place X2 into the PCB spot marked for it.
There is a capacitor part which is the same footprint and adjacent to the crystal.
 |
| 3 |
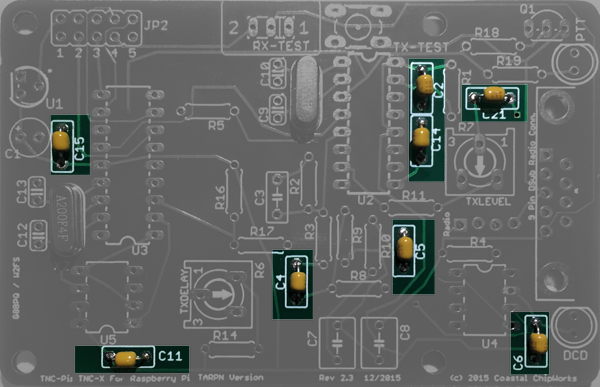
C2, C4, C5, C6,
C11, C14, C15, C21 |
0.1
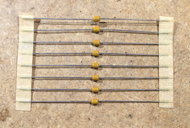 |
Eight yellow non-polorized barrels
|
| 4 |
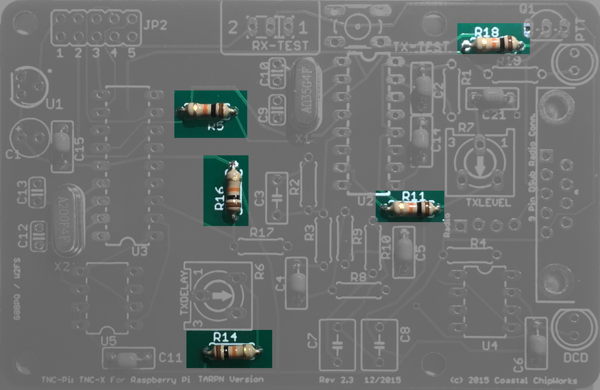
R5, R11, R14,
R16, R18 |
10K resistor
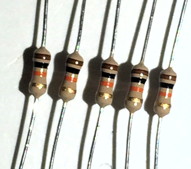 |
Brown, black, orange
 |
| 5 |
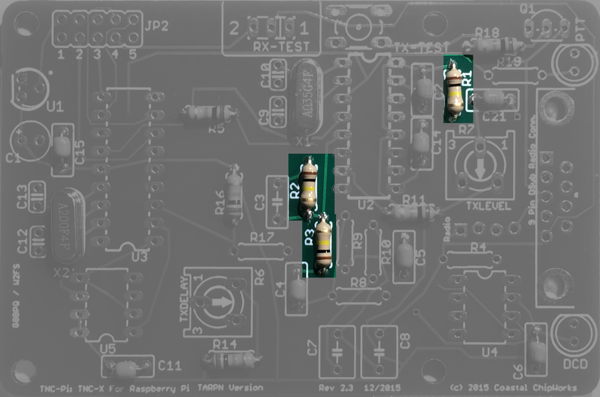
R1, R2, R3 |
100K resistor
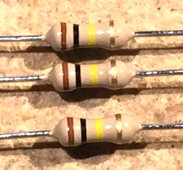 > > |
Brown, black, yellow
 |
| 6 |
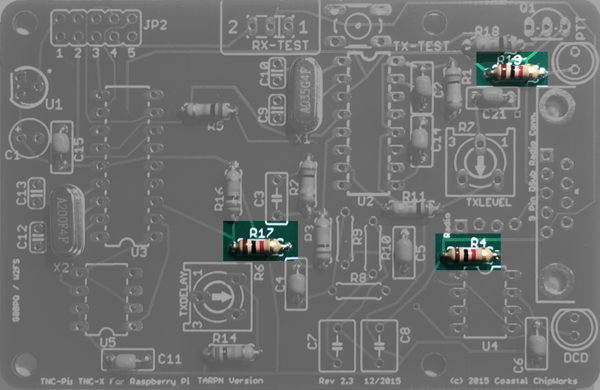
R4, R17, R19 |
1K resistor
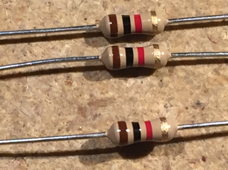 |
Brown, black, red
 |
| 7 |
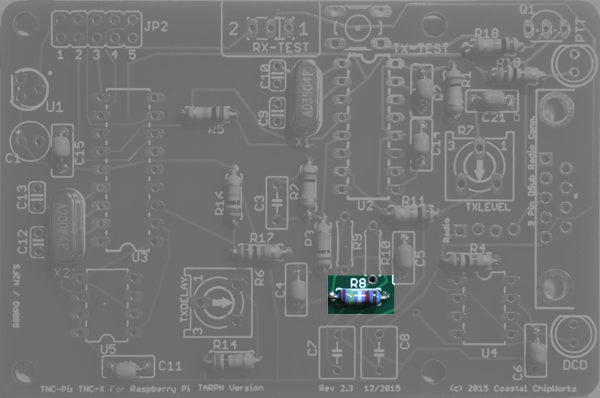
R8 |
24.9K resistor
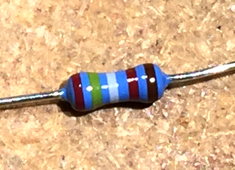 |
Red, yellow, white, red, brown
 |
| 8 |
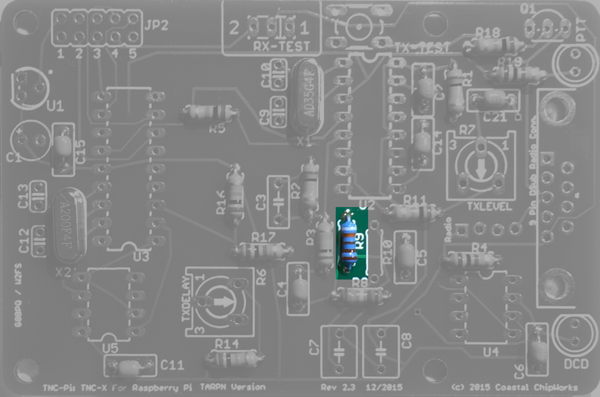
R9 |
9.31K resistor
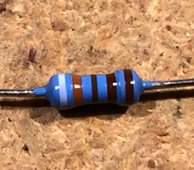 |
White, orange, brown, brown, brown
 |
| 9 |
R10 |
18.7K resistor
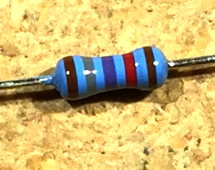 |
Brown, grey, purple, red, brown
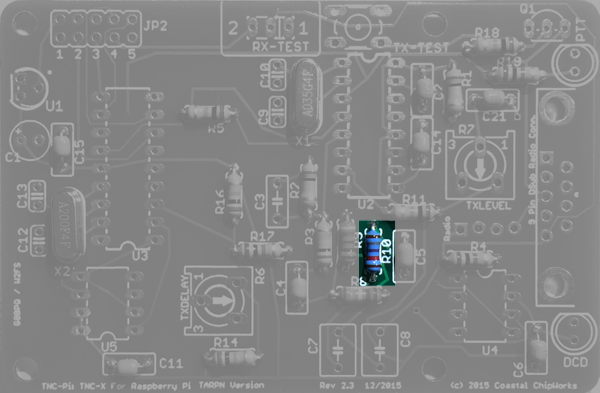 |
Inspect the soldering around R10 and make sure you do not have a short between R10 and R11
| 10 |
U2, U3
U4, U5 |
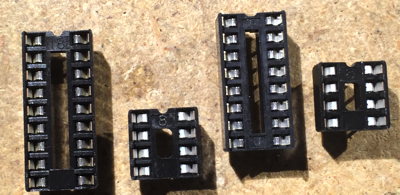
IC Sockets
One 16-pin, one 18-pin
and two 8-pin sockets
 |
These are usually installed
and soldered one at a time. You can either hold the socket with a finger
while soldering the two corner pins in, then finish the rest of the pins, or you can insert the socket and then bend out two
of the corner pins to hold it into place.
Be careful of the orientation.
They are not all pointing the same way!
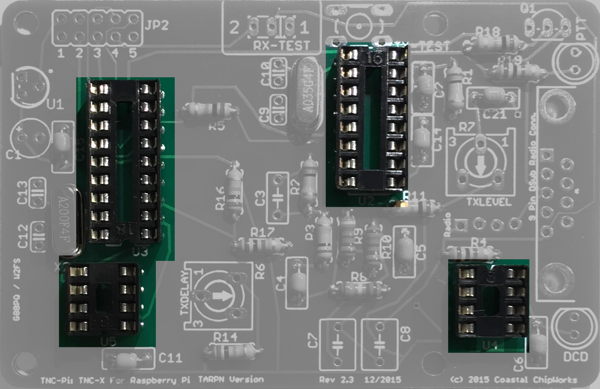 |
Make sure you arrange the sockets so the divit at one end lines up with the markings on the PC board.
Note that some of the sockets are opposite of each other. Do not install the ICs in the sockets at this point.
| 11 |
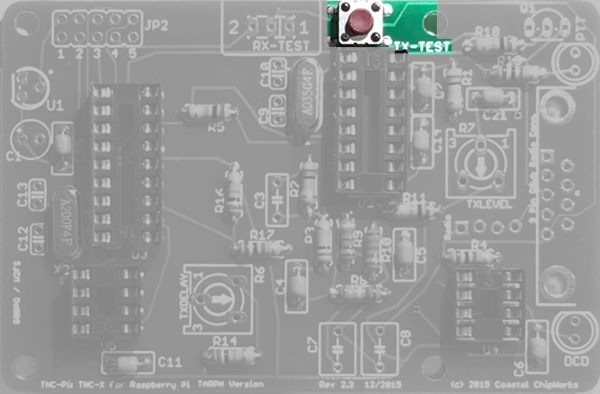
TX TEST |
pushbutton, 4-pin
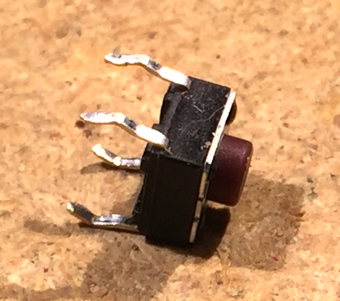 |
Carefully wiggle the four pins through their holes.
Don't put excess pressure else they bend and are hard to put back.
|
| 12 |
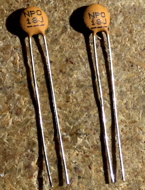
C9, C10 |
18 pf
 |
ceramic disk
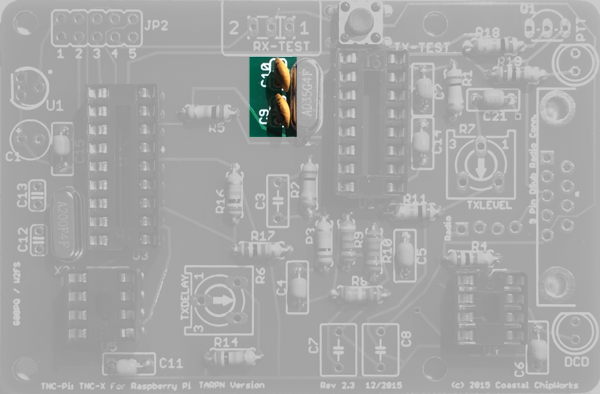
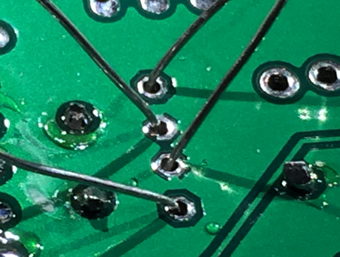
⇐ When stuffing the capacitors, direct the wires so they don't cross. This will enable you to solder the pads without shorting. |
| 13 |
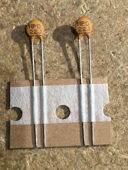
C12, C13 |
22 pf
 |
ceramic disk
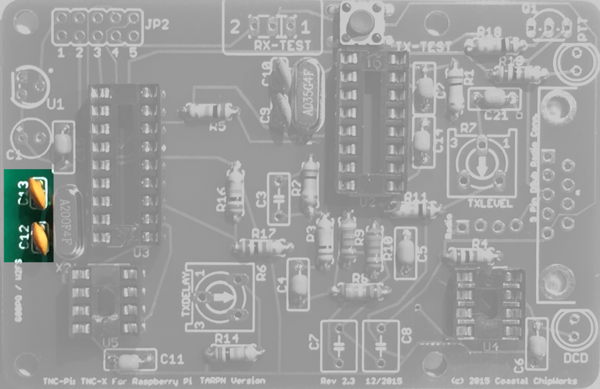
⇐ When stuffing the capacitors, direct the wires so they don't cross. This will enable you to solder the pads without shorting. |
| 14 |
C7, C8 |
0.01 μf 2.5%
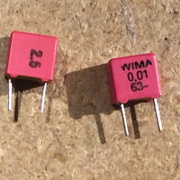 |
Red and yellow or grey; if grey marked 10 nF
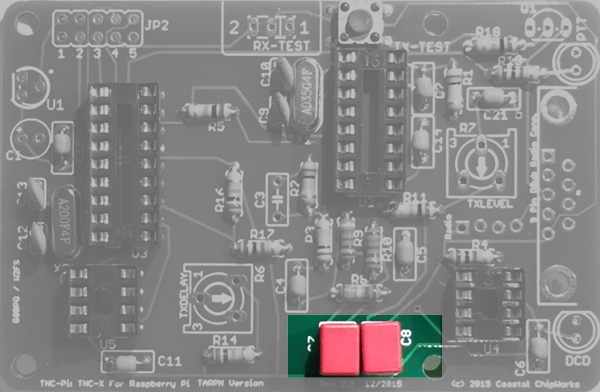
|
| 15 |
C3 |
100 pf
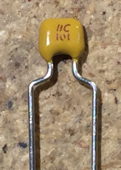
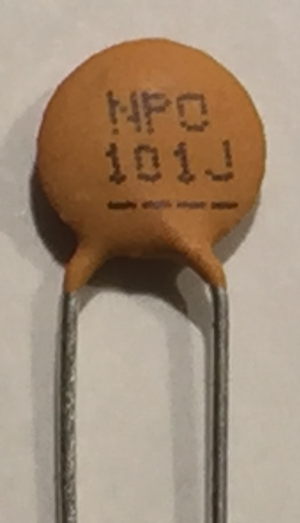 |
labelled 101
ceramic disk or dipped
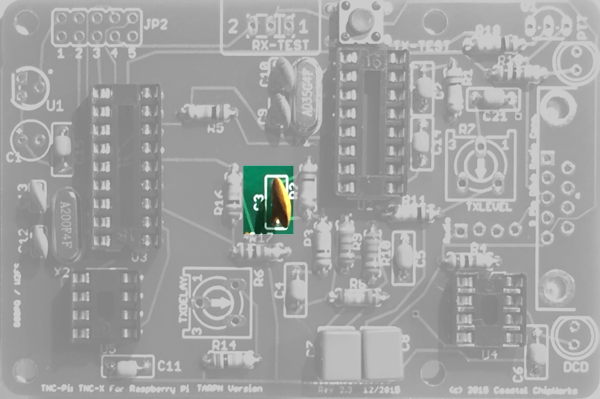 |
| 16 |
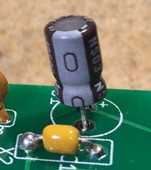
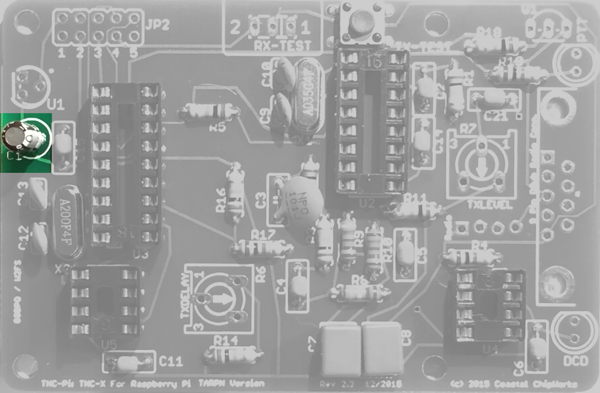
C1 |
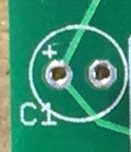
10 μf Polarized
electrolytic capacitor
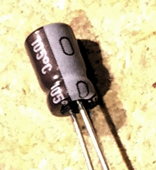
| Part has stripe on one side with ‑ sign.
The other side lines up with + sign in the silkscreen.
|
| 17 |
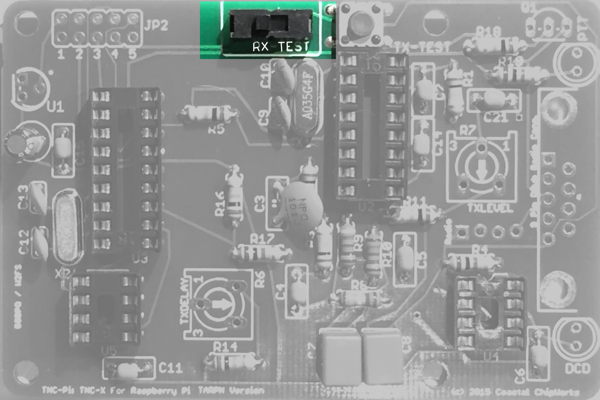
SPDT
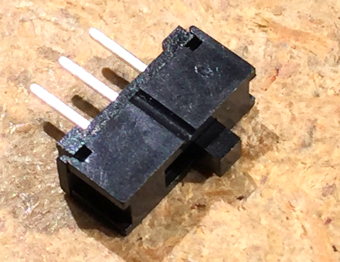 |
slide switch, 3-pin. Orientation doesn't matter.
|
| 18 |
Q1 |
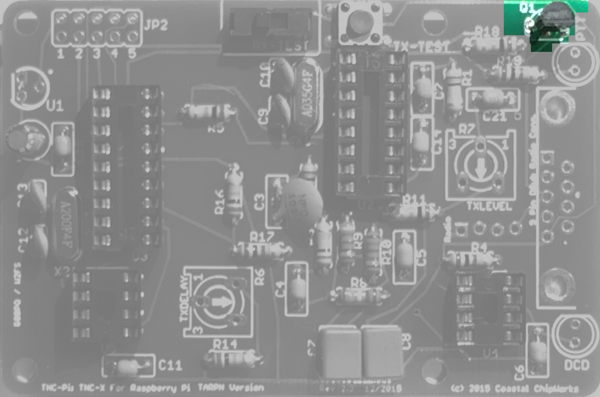
PN2222 transistor
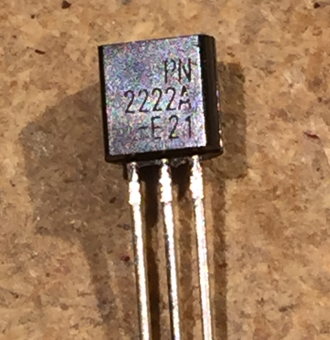 |
3-pin -- orientation is important! Line up part with silk-screen.
Do not confused with U1
 |
| 19 |
U1 |
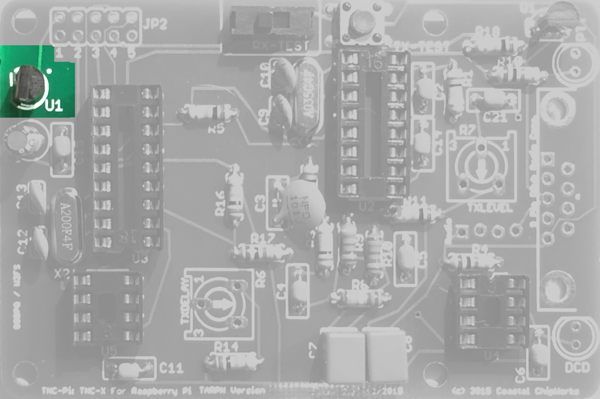
Regulator MCP1700-33
or
MCP1700-30
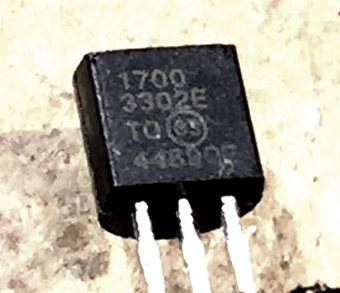 |
3 pin
Install so the flat side is toward the edge of the board.
|
| 20 |
JP2 |
2 x 5 header
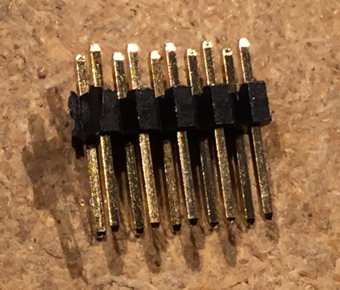
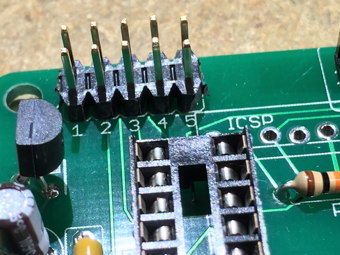 |
Insert on top, solder from bottom
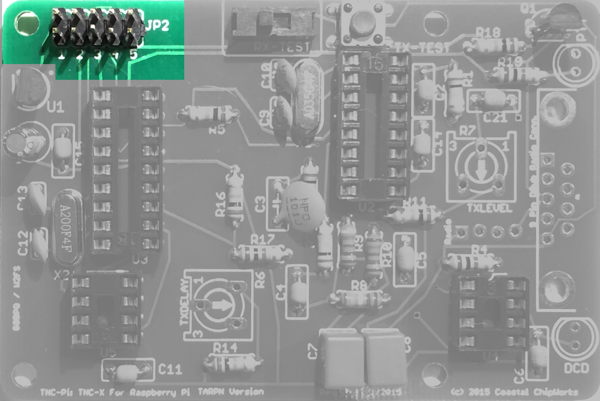
Short pin goes down through the board.
Long pin side is up.
See pic on left.
|
| 21 |
|
|
Power up and test voltage |
- Shutdown your Raspberry PI and remove its memory card.
This will keep the file system on the card from getting corrupted if there is any debugging to be done.
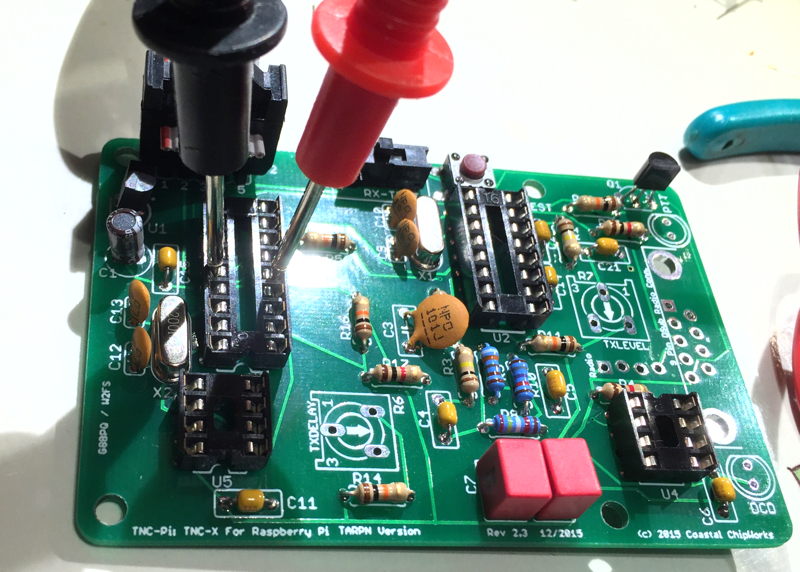
- Locate the largest IC socket on the board which is U3.
It is 9 pins on a side.
- Use a ribbon cable to connect the TNC-PI to a Raspberry PI.
Make sure the ribbon is aligned so pin 1 of the Raspberry PI is on the same end of the ribbon as pin 1 on the TNC-PI.
In both cases, the pin 1 end of the connector is away from the USB-Ethernet-DE9 connectors.
- Power up the Raspberry PI without its memory card.
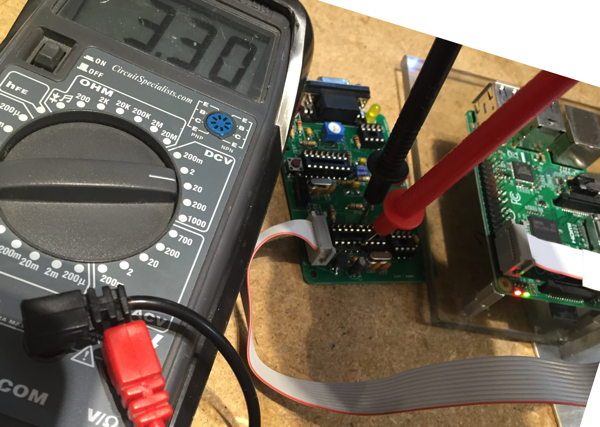
- Use a voltmeter to check the voltage between the middle pin on one side of U3 and the middle pin on the other side of U3, i.e. pins 5 and 14.
The voltage difference between the two should be 3.3 volts.
- Any voltages between 3.25 and 3.35 will do.
Pin 5 is the negative side and pin 14 is the positive side.
We're really only interested that it is 3.3 volts.
- Power off the Raspberry PI and disconnect the ribbon from the TNC-PI.
- Make sure you keep track of your memory card. You can put it back into the Raspberry PI.
- If there is a problem, inspect the Regulator U1, capacitor C1 and header JP2.
Soldering is usually the problem.
Reversing a component would also be bad.
Use your VOM to see how far the voltage gets.
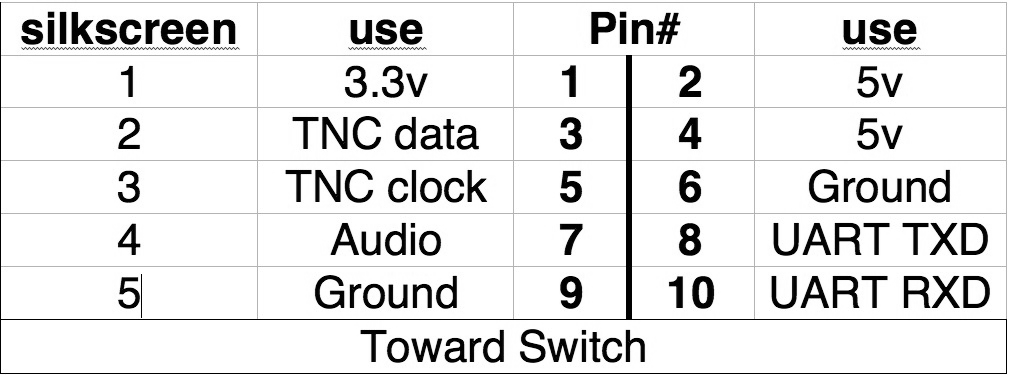
You will be tracing the 5v signal from pin 2 (see chart below) of header JP2 to U1, where it is regulated down to 3.3v, to C1 to U3.
Here is the pin-out of JP2.
5v is on the outside of JP2 near the board edge.
On some boards there is silk-screen which incorrectly identifies the pin#s on the inside edge of JP2 as 1,2,3,4,5.
They should be identified as 1,3,5,7,9.
Send an email on TARPN yahoo group if you are still having an issue.
| 22 |
D5 |
Yellow LED (DCD)
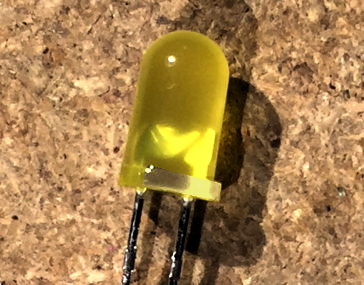 |
Polarized -- make sure the square end
lines up with the silkscreen.
Ensure the shorter leads on the LEDs go through the holes closest to the flat side of the LED outline. |
| 23 |
D4 |
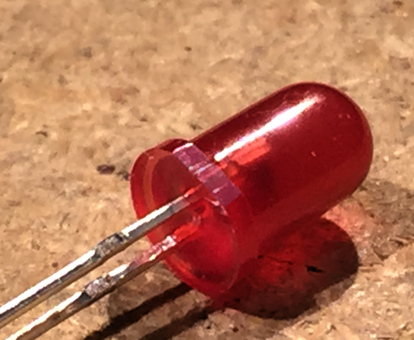
Red LED (PTT)
|
Polarized -- make sure the square end
lines up with the silkscreen.
 |
| 24 |
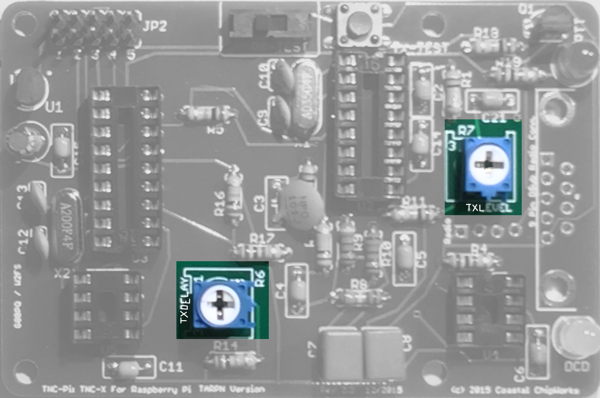
R6 and R7 |
10K trimmer potentiometers
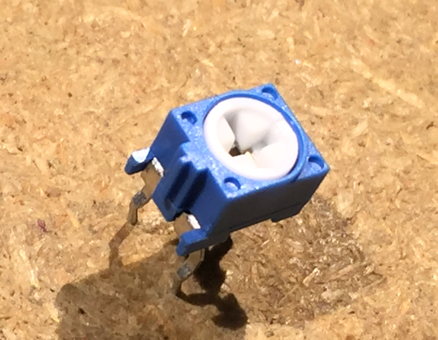 |
Orange or blue and white
Carefully wiggle the three pins through their holes.
Don't put excess pressure else they bend and are hard to put back.
 |
| 25 |
|
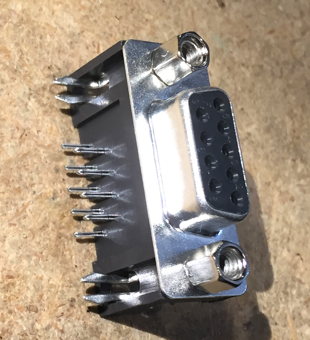
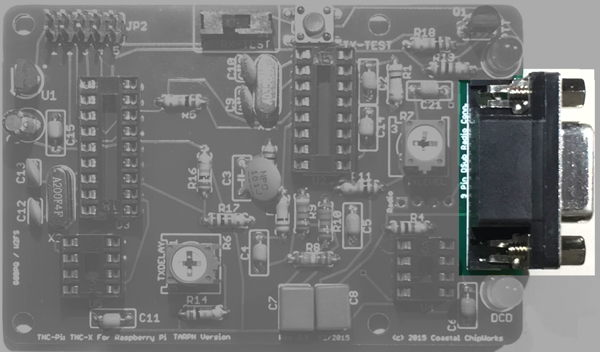
DE-9 connector
|
Push flush to the board.
Solder the 2 large pin-pairs on the side holes first while forcing the connector solidly onto the board.
This will give you the most robust connector.
Next solder the 9 small pins.
 |
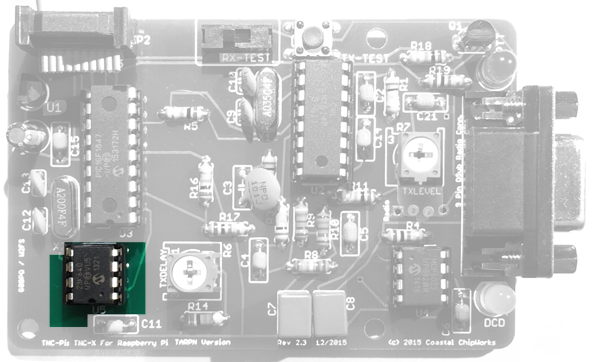
| Install Integrated Circuits U2 through U5 |
|
You may wish to bend the pins of the four ICs slightly inward to facilitate inserting them into their sockets.
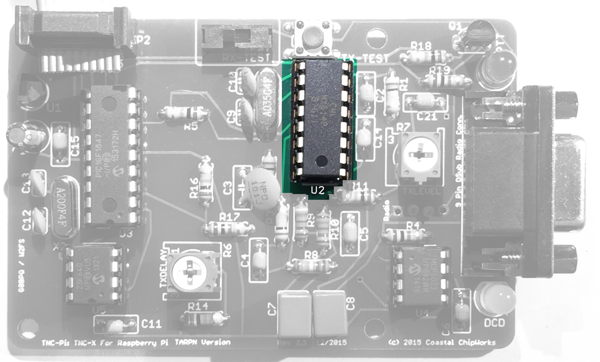
Ensure the notch on the top of each chip lines up with the notch printed on the PC board.
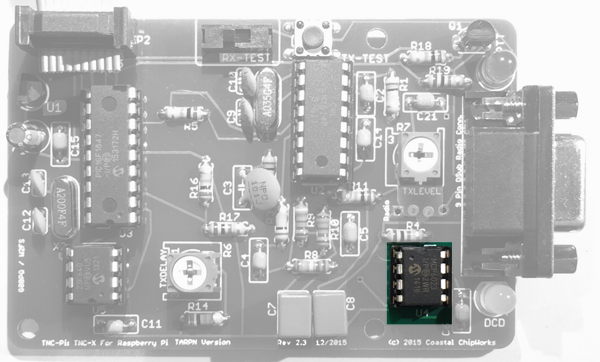
Also make absolutely certain that you do not mix up the two 8 pin chips and plug them into the wrong sockets.
|
| 26 |
U2 |
CML MX-614 Modem
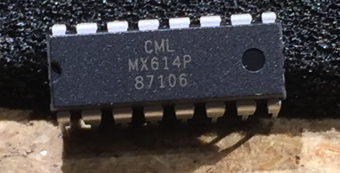 |
16 pin IC
|
| 27 |
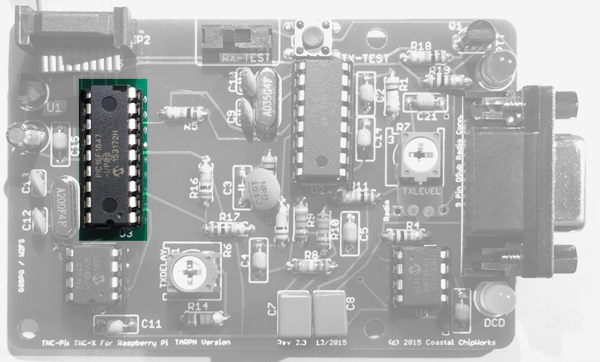
U3 |
PIC16F1847 microcontroller
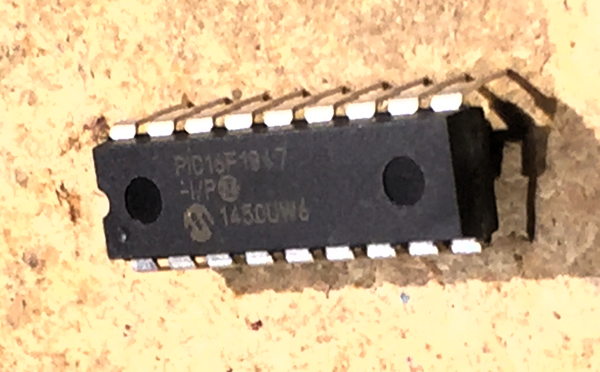 |
18 pin IC
|
| 28 |
U4 |
MCP6023 Op Amp
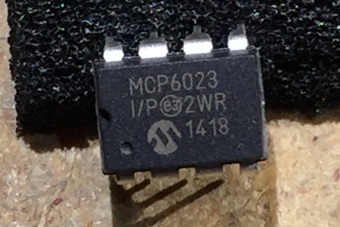 |
8 pin IC
 |
| 29 |
U5 |
23K640 Memory
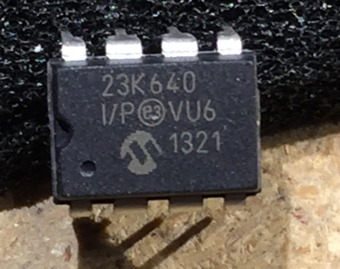 |
8 pin IC
 |
Shutdown your Raspberry PI and remove its memory card.
This will keep the file system on the card from getting corrupted if the power is removed and re-applied arbitrarily.
Connect up the TNC-PI ribbon to the Raspberry PI, observing proper ribbon polarity.
While observing the the LEDs on the TNC-PI, apply power to the Raspberry PI.
The RED and YELLOW LEDs should both illuminate, then the RED goes off, followed by the YELLOW.
Some additional flickering may also be observed after the two LEDs first go out.
Congratulations. You’re done assembling the TNC-Pi.
Configure TNC-PI



 >
>


