QT-term-TCP Terminal for G8BPQ Node
QT-term-TCP, also known as BPQterm, is the basic most-useful tool for commanding and monitoring your node.
Every node operator enthusiast should take the time to learn how to set up, use, and to take advantage of this program.
Packet radio linking using AX.25 is intricate and deep.
You don't need to understand all of it to get it to work.
This program lets you start at a basic level.
When you decide to dig into the underpinnings, this program also lets you do that.
QT-term-TCP connects into your node and allows entering of node commands and inspection of the traffic passing in and out of the node.
The
QT-term-TCP program is a free application with source code.
The program is installed on your Raspberry PI desktop for use with VNC, or with a local display.
The program can be compiled for different systems.
The TARPN installer puts the
QT-term-TCP for Raspberry PI onto the desktop.
The Macintosh version is here:
QT-term-TCP for MacOSX
Link to G8BPQ's page for other OS support for QT-term-TCP
A configuration step is required to give the
QT-term-TCP your log-in name.
In the TARPN case, this log-in is your callsign, in lower case.
The photos below show the sequence of configuring and running
QT-term-TCP.
QTtermTCP from Raspbery PI via VNC
Get connected to the desktop of your Raspberry PI using one of these VNC clients.
RealVNC
or
TigerVNC for Mac.
After installing one of the VNC client programs, tell it to connect to your Raspberry PI's IP address.
If it tells you it can't open the video, you may need to set a default resolution.
That's done with
sudo raspi-config in a Raspberry Pi Terminal session.
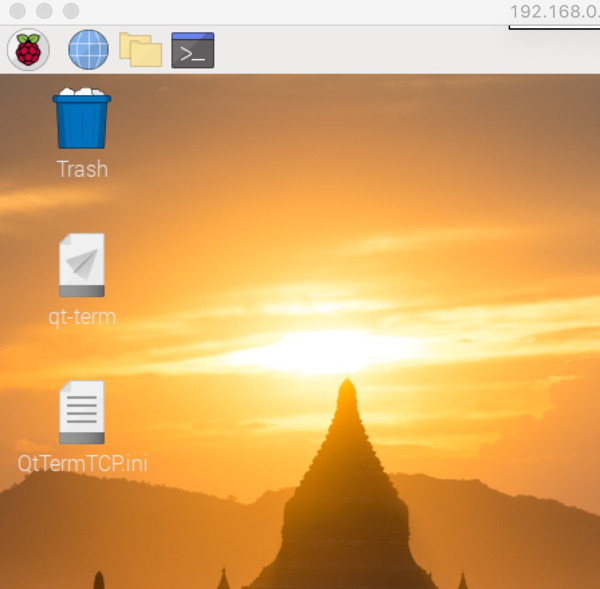
Back to the Raspberry PI
In the upper left of the desktop is the
QT-term-TCP icon -- it will be named qt-term or QTterm.
Double click on that.

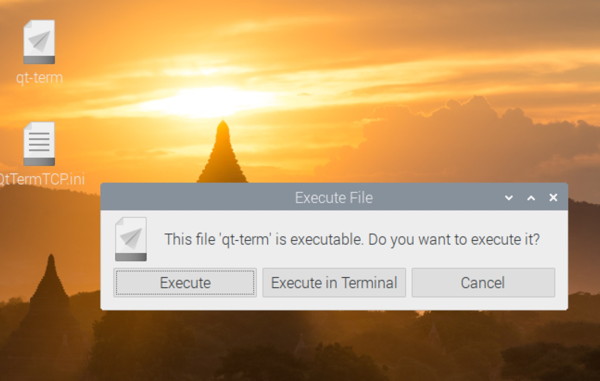
A dialog will open asking if you want to execute this to the screen, or to a terminal session.
Click on "execute" which will let it drive a window to the screen.
Generically, QTtermTCP
The versions by different people and at different times and for different OSs will be slightly different.
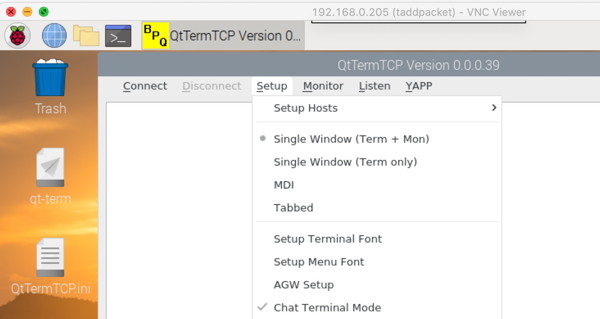
After launching QTtermTCP, you'll see something like this.
Click on the Setup pull down menu,

Hover over the first line in the menu, Setup Hosts.
This is one place where running
QT-term-TCP from the PI desktop is different from running a MSWindows (or other) version of
QT-term-TCP.
For remote controlling from another workstation, the IP address you'll enter for the host info will be the IP address of the Raspberry PI.
If you are running this on the PI desktop:
Another menu shows up headed with 127.0.1.1.
Click on 127.0.1.1.
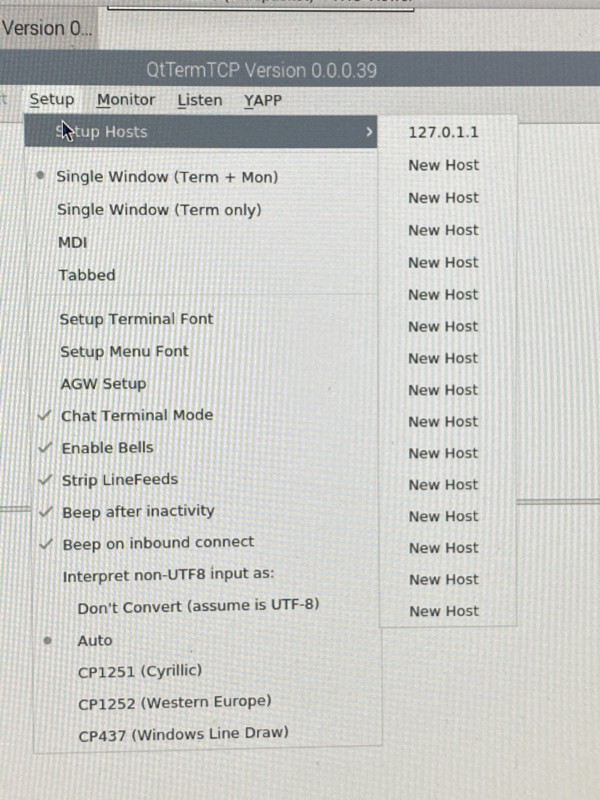
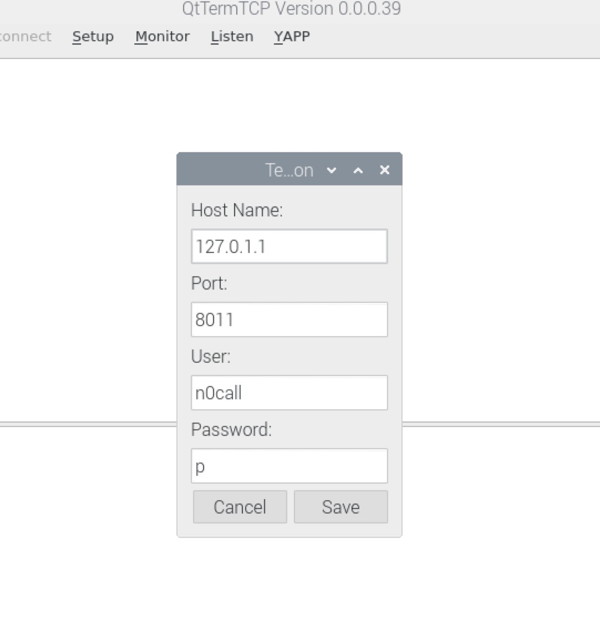
A dialog box appears prompting you for four figures.
Conveniently, 3 of those figures are already filled in.
You just need to replace n0call with your callsign, in lower case.
This will serve as a log-in to your node.
Confirm your change with the Save button and then click on the Connect pull-down menu..
Click on the only available Connection, 127.0.1.1.
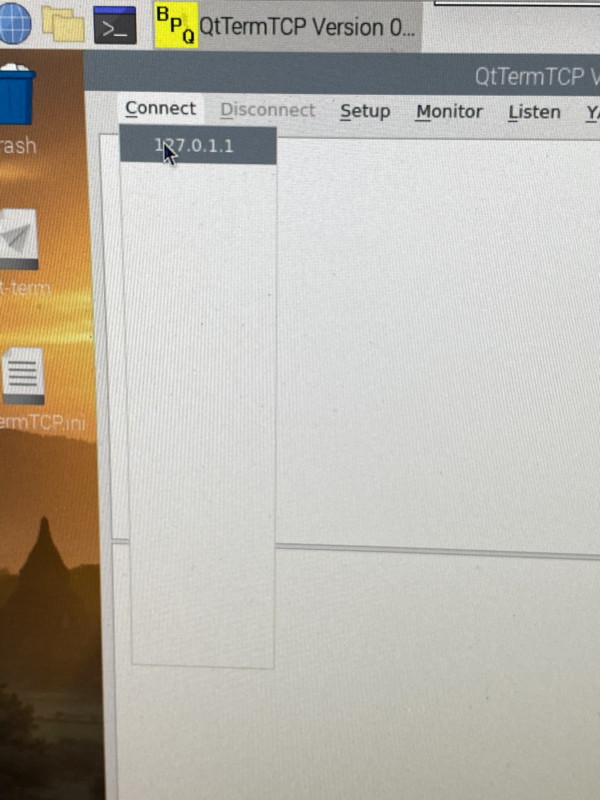
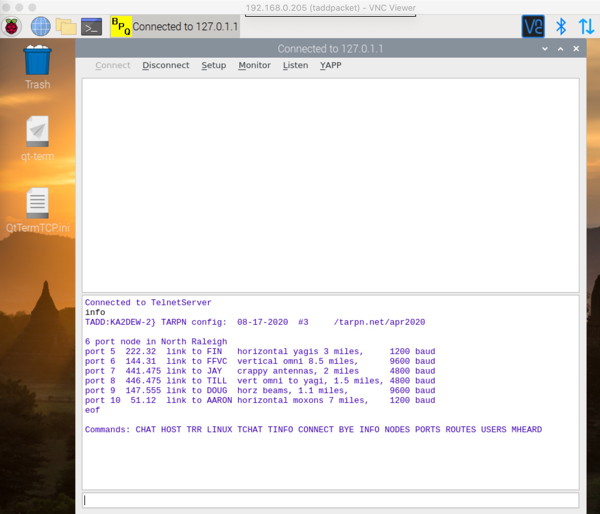
The program will connect you to your node.
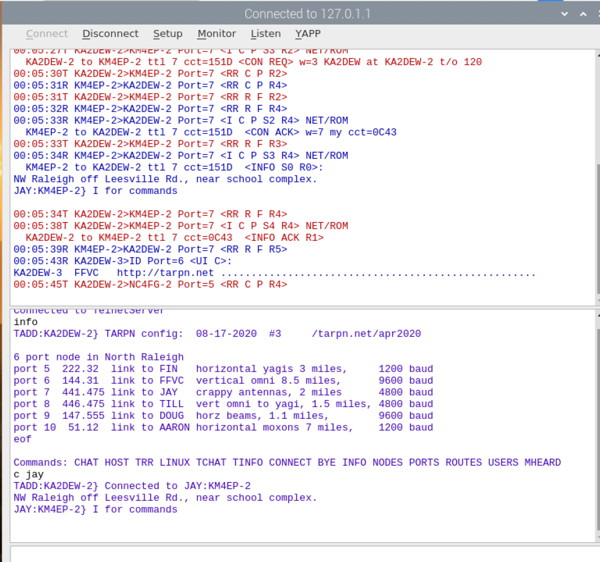
If the node is running, the lower large pane will show "Connected to TelnetServer".

Now you can move the cursor down to the 3rd pane, which is short and wide.
Here is where you can type G8BPQ node commands.
For the purposes of showing what this does, I typed "info".

This is the INFO result
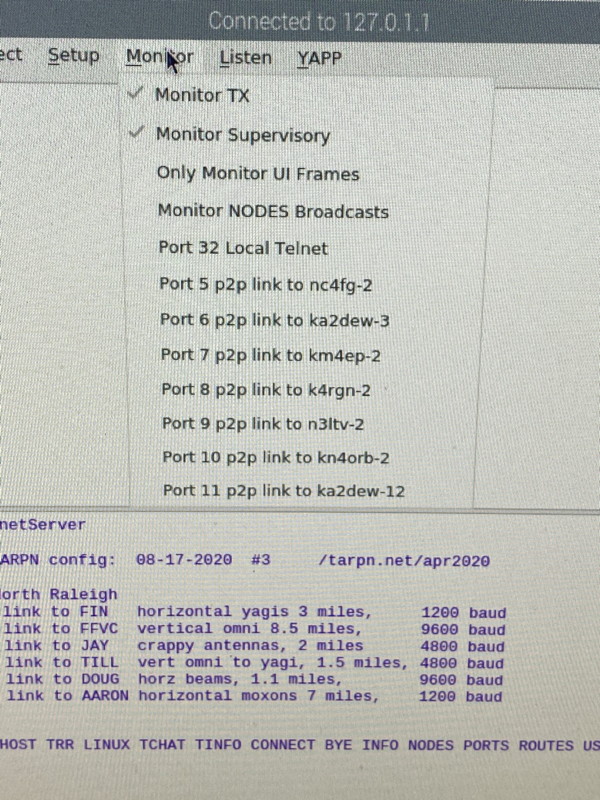
Now go over to the Monitor pull down.
This menu enables you to turn on Monitoring on one or more of your ports.
Monitor results show up in the upper large pane.
I suggest turning on Monitor TX, Monitor Supervisory, Monitor NODES Broadcasts, and then one or more of your po rts.
Here is some example data showing in the Monitor pane.
This is showing traffic heard by your node's radios
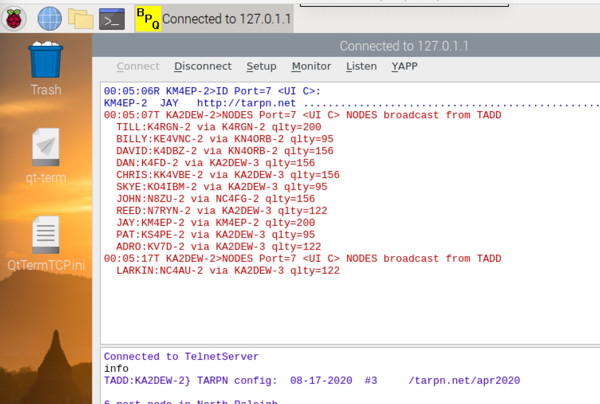
In the upper, Monitor pane, blue indicates received traffic.
Red is transmitted traffic.
Each packet is identified with a time-stamp, the from-call, the to-call, and the port number on your node which is sending or receiving the packet.
G8BPQ has a web page about his QT-TERM program and project:
CANTAB.NET QtTermTCP
See also:
Using QTtermTCP (or TARPN-MON) to analyze packet traffic.